Getting Started with RDKit and Jupyter
RDKit is a cheminformatics toolkit with bindings for Python. It's packed with functionality, deployed within multiple open source projects, and is widely-used in machine learning applications. RDKit can also be difficult to install. This article discusses the problem and a method for using RDKit within Jupyter notebooks.
Installation Options
The Python Package Index (aka PyPI, aka pip) is Python's standard package manager. Unfortunately, no PyPI package for RDKit exists, precluding pip install rdkit. A two-year old issue explains some of the reasons. A pull request is in the works, but with unclear status. For more, see the post by project lead Greg Landrum.
Under the "Installation" heading the RDKit README lists several installers built to work with platform-specific package managers. Although your results may vary, my experience with the macOS Homebrew formula resulted in an error that neither the maintainer nor I could resolve. Ultimately, the maintainer offered the following advice:
Try the anaconda installer.
I don't like it and I don't use it but it is the officially supported way to install rdkit…
I was trying to avoid this option because Anaconda seems like a sledgehammer when the situation calls for little more than a screwdriver. Moreover, the README never specifically recommends Anaconda as the preferred installation method. It does however link to an Installation document that leads with Anaconda, noting that this is the "fastest install."
Ultimately, using Anaconda worked. What follows are some notes on my process for setting up RDKit together with Jupyter on a macOS system running Mojave. Many of the points addressed here should apply to other operating systems.
Install Anaconda
After downloading the graphical installer, I verified its SHA-256 hash (note the two spaces between the hash value and filename):
$ echo "e095c487d2837e4c984d0fcd2217be42c615504a2d7d6651095d34c2fa9807a0  Anaconda3-2020.07-MacOSX-x86_64.pkg" | shasum -a 256 -c -
Anaconda3-2020.07-MacOSX-x86_64.pkg: OK
Expected hashes for all Anaconda installers are available here.
With these preliminaries out of the way, I launched the installer and clicked through the screens.
All Your Base
After installing Anaconda I was greeted by a most unwelcome, persistent, foreign terminal prompt:
(base) $
Fortunately, the fix was easy:
conda config --set auto_activate_base False
source ~/.bash_profile
Should you want to query this flag in the future, use:
conda config --show | grep auto_activate_base
The explanation can be found in this question. To understand what this base business is all about, we need to dive deeper into Anaconda.
About Anaconda
To say that Anaconda is confusing to the beginner would be an understatement. It's a company. It's a suite of tools, some of which are open source. It contains a package manager ("conda"), hundreds of pre-installed packages, and other things. The Anaconda homepage offers little in the way of usable information, opting instead for marketing speak. I found the answers to this question and its links much more informative. For an excellent if somewhat dated overview, see Conda Myths and Misconceptions.
For the moment, think of Anaconda as a way to create and manage independent environments containing Python and associated packages. The (base) notation described above conveyed the fact that the Anaconda was using the "base" environment by default.
Install RDKit into an Anaconda Environment
As per the RDKit Installation page, we can create a new Anaconda environment to be used with RDKit as follows:
conda create -c rdkit -n my-rdkit-env rdkit
Breaking this down as per the conda documentation:
-c rdkit: Use the rdkit feedstock from Conda-Forge-n my-rdkit-env: The arbitrary name of the environment (my-rdkit-env). Pick something you like. For example,rdkit-testalso works.rdkit: The identifier for the package(s) to install
After some console output, verify the availability of the new environment:
$ conda env list
# conda environments:
#
base                  *  /opt/anaconda3
my-rdkit-env             /opt/anaconda3/envs/my-rdkit-env
The asterisk indicates the current environment.
Activate RDKit Environment
The new environment, which should contain RDKit, can be tested with the following (replace my-rdkit-env with the name of your environment):
$ conda activate my-rdkit-env
(my-rdikit-env) $
Doing this should update your command prompt. You're now running an environment into which RDKit has been installed. Test this with the following:
python
>>> from rdkit import rdBase
>>> rdBase.rdkitVersion
'2020.03.3'
When you're done, deactivate the environment with
conda deactivate
Install Jupyter
Jupyter Notebook is a browser-based environment in which documents containing live code and output can be created and shared. Its many features make Jupyter a popular alternative or addition to the Python REPL. See the next section to get an idea of how this works.
Jupyter is not accessible by default from new Anaconda environments. It can be made accessible with the nb_conda_kernels extension, which can be installed into an existing environment:
$ conda install -n my-rdkit-env nb_conda_kernels
Now activate the environment and run Jupyter Notebook with:
$ conda activate my-rdkit-env
(my-rdkit-env) $ jupyter notebook
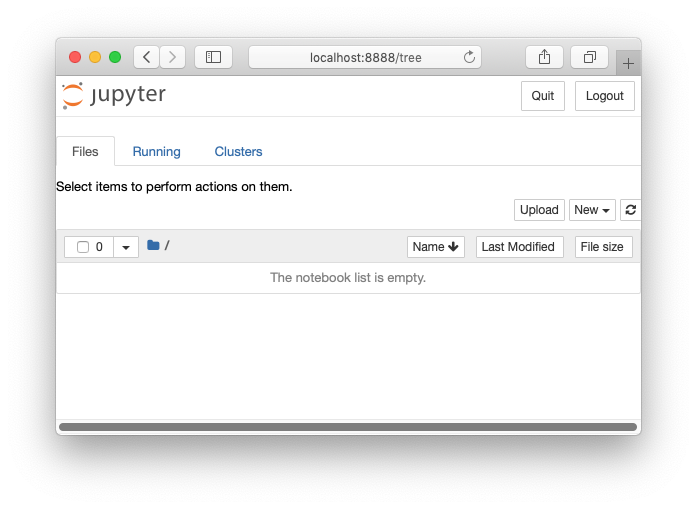
This should produce output indicating that a web server is running. It should also launch your default web browser and direct it to a directory listing page.
You'll probably recognize the items listed as your current working directory. By default, Jupyter exposes the contents of your working directory, using it to store and load notebooks. To change this behavior, stop the server (control-c), create a directory to hold notebooks, and restart using the notebook-dir option:
(my-rdkit-env) $ mkdir notebooks
(my-rdkit-env) $ jupyter notebook --notebook-dir=notebooks
You should see an empty notebook list this time.
Hello, Benzene
At this point, it's straightforward to use RDKit within a Notebook. Be sure your environment is activated, then launch Jupyter:
(my-rdkit-env) $ jupyter notebook --notebook-dir=notebooks
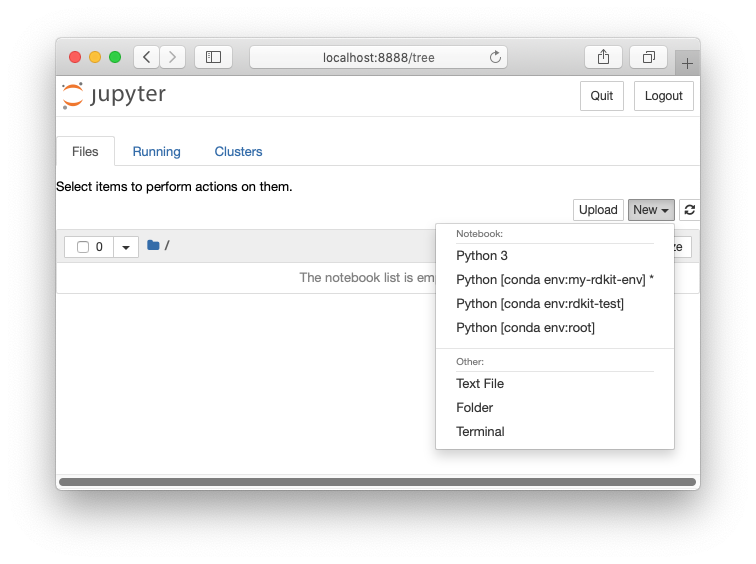
A pulldown button appears to the upper-right of the screen. Click it and select the entry marked Python [conda env::my-rdkit-env] (where my-rdkit-env is the name of your environment). This will ensure that RDKit is accessible from your new notebook.
Jupyter is organized into blocks of code (In) and output (Out) collectively known as "cells." Create a cell that will display a 2D representation of a benzene molecule as follows:
Keep two guidelines in mind:
- A cell outputs the value obtained from evaluating the last expression. If this is an RDKit molecule, then a 2D image will be displayed.
- To run a cell, click the "Run" button at the top, or press shift-enter.
At this point, almost anything possible in RDKit will also be possible from a Notebook. For ideas, check out the RDKit Cookbook.
Colab
Getting RDKit installed with Jupyter isn't especially hard, but it's somewhat involved. For an easier setup, consider Google Colab. Colab is a Notebook server hosted by Google. As described in a series of videos, RDKit can be installed into Colab, eliminating most of the work described in this tutorial.
The catch is that RDKit appears to require re-installation before every use within Colab.
Conclusion
RDKit has become an essential software package for cheminformatics. Unfortunately, installation of RDKit doesn't follow the happy path of pip install. For now, the most reliable option appears to be Anaconda, as described here. With some additional configuration RDKit and Jupyter Notebooks can be used together seamlessly.